Rapidpro Installation
Introduction and Overview
RapidPro is an Open Source platform that allows anyone to build interactive messaging systems using an easy visual interface. A video is worth a thousand words and this brief video introduction will give you an idea of what is possible.
Installation
To install Rapidpro,follow the following steps <ol> <li><b>Prerequisites Installation</b> <ul> <li>PostgreSQL 9.3 or later along with the PostGIS extensions. You may refer to Django’s installation instructions to help get this working or you may just run below commands: <ul> <li> Postgresql and postgis installation
$ sudo apt-get install postgresql
$ sudo apt-get install postgis
$ sudo apt-get install postgresql-X.Y-postgis-2.1 #replace X.Y with the version number of postgresql
</li> </ul> </li> <li>Redis 2.8 or later installed and listening on localhost. By default the development server uses database 15. You may install this through debian package manager
   $ sudo apt-get install redis-server
or by downloading it on  `redis website <http://redis.io/>`_ </li>
<li> lessc , the Less compiler.
$ apt-get install npm
$ npm install -g less
</li> <li> coffee , the Coffee script compiler. You may also install this with
$ sudo apt-get install coffeescript
</li> </ul> </li> <li> <b>Create Temba User For PostgreSQL</b>
$ sudo -u postgres createuser temba --superuser --pwprompt -d
$ sudo adduser temba
</li> <li><b>Create temba database, add PostGIS</b>
Create the database as temba user:
$ sudo -u temba psql --user=temba postgres
postgres=> create database temba;
CREATE DATABASE
\q
Now connect as superuser that can install extensions
$ sudo apt-get install postgresql-contrib-X.Y #replace X.Y with version number i.e 9.3
$ sudo -u temba psql --user=temba postgres
$ postgres=# \c temba
$ You are now connected to database "temba" as user "psql".
$ temba=# create extension postgis;
$ CREATE EXTENSION
$ temba=# create extension postgis_topology;
$ CREATE EXTENSION
$ temba=# create extension hstore;
$ CREATE EXTENSION
</li> <li> <b>Clone Rapidpro</b><br> Now clone the RapidPro repository and link up the development settings:
$ git clone git@github.com:rapidpro/rapidpro.git
$ cd rapidpro
$ ln -s temba/settings.py.dev temba/settings.py
NB:open the file temba/settings.py to make sure that it was created,if its missing or empty,do this
$ cp temba/settings.py.dev temba/settings.py
NB:You will need to confirm if the database name,user and password in the settings.py matches the one created during postgresql installation,the following is the default database name,database user and password inside temba/settings.py
DATABASES = {
    'default': {
        'ENGINE': 'django.contrib.gis.db.backends.postgis',
        'NAME': 'temba',
        'USER': 'temba',
        'PASSWORD': 'temba',
        'HOST': 'localhost',
        'PORT': '',
        'ATOMIC_REQUESTS': True,
        'OPTIONS': {
        }
    }
}
</li> <li><b>Build Virtual Environment</b><br> You should always use a virtual environment to run your RapidPro installation. The pinned dependencies for RapidPro can be found in pip-freeze.txt. You can build the needed environment as follows (from the root rapidpro directory):
$ sudo apt-get install python-virtualenv postgresql-server-dev-9.3 python-dev ncurses-dev
$ cd /path/to/your/root/directory/of/rapidpro
$ virtualenv env
$ source env/bin/activate
(env)$ pip install -r pip-freeze.txt
</li> <li> <b>Sync your database</b><br> You should now be able to run all the migrations and initialize your development server. This takes a little while on RapidPro as syncdb also creates and initializes all the user groups and permissions.
(env)$ python manage.py syncdb
</li> <li> <b>If you want to create a super user,run this command while the env is still activated</b>
(env)$ python manage.py createsuperuser
</li> <li> <b>Run development server</b><br> At this point you’ll be able to run the development server and run RapidPro. It will be available at http://localhost:8000 or you may specify a different port number if you wish to change the default port number.
(env)$ python manage.py runserver 0.0.0.0:8000
</li> <li> <b>Credits allocation to user accounts</b><br> There are some features that by default are disabled until an account get allocated some credits by the administrator.E.g An account can not invite users to join unless that account has been allocated atleast 100,000 credits,similarly the workflow import feature is disabled until an account get allocated some credits.<br> To allocate credits to an account login to Rapidpro as an administrator,you will be taken directly to an account/Organization management window,click the organization name as below:
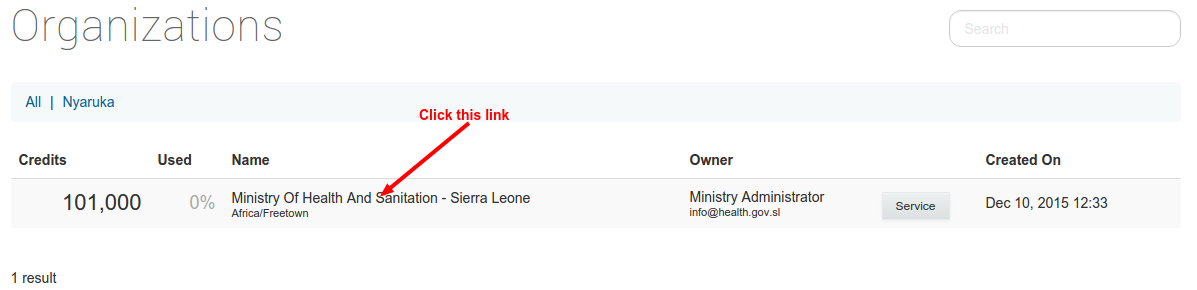
<br><br>Then Click the TopUps button as in the picture below:
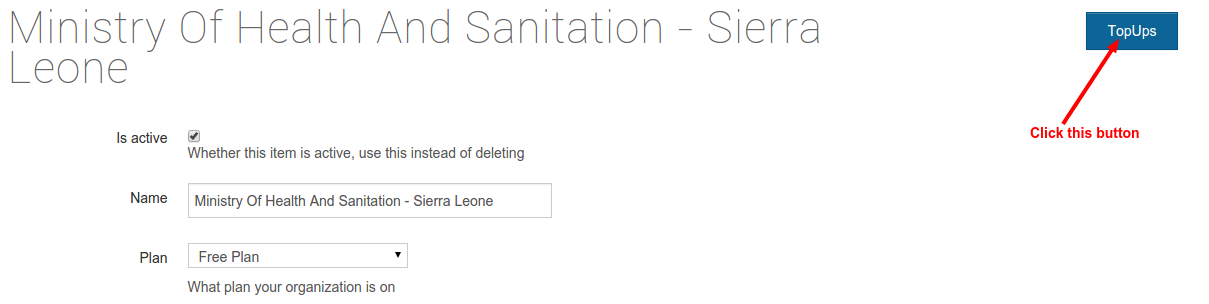
<br><br>Click the Add TopUps button as in the picture below:
